[Top] [Prev] [Next] [Bottom]
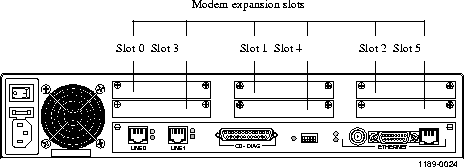
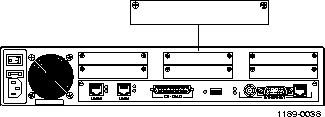
Follow these instructions to install digital modem cards.
Caution ¯  Digital modem cards can be installed or removed while the PortMaster 3 is in use. If a card is removed while the PortMaster 3 is in use, all connections associated with that card are terminated.
Wear a grounding strap when handling the internal components of the PortMaster 3.
-
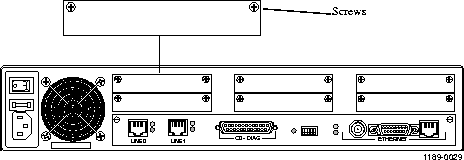
Remove the backplate of a modem card port by unscrewing the two phillips screws.
-
Store the backplate and screws in a safe place.
-
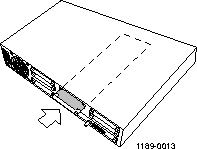
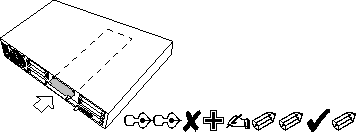
With the port end of the modem card facing the rear panel of the PortMaster 3, insert the modem card into the two slide guides at the opening.
-
Ensure that the rear connector is facing up.

-
Gently slide the modem card into the chassis until the rear connectors of the card touch the rear connectors of the chassis.
-
Gently press the front of the modem card until it is fully seated.
-
The 48-pin connectors should slide smoothly together; do not force the connectors together.
-
Tighten the thumbscrews on the modem card.
-
Once the modem card is installed, it is ready for use. No additional configuration is required.
Follow these instructions to remove digital modem cards from the PortMaster 3.
Caution ¯  Digital modem cards can be installed or removed while the PortMaster 3 is in use. If a card is removed while the PortMaster 3 is in use, all connections associated with that card are terminated.
Wear a grounding strap when handling the internal components of the PortMaster 3.
-
Loosen the thumbscrews on the modem card.
-
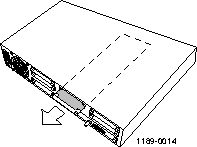
Using the thumbscrews as handles, gently pull the modem card until the connectors release.
-
If you have difficulty getting the connectors to release, gently move the modem card from
side to side.
-
With the modem card disconnected completely from the connectors, gently slide the card back through the opening until the card is completely out.
-
Secure the faceplate that originally came installed on the PortMaster 3.
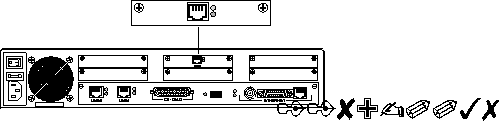
Follow these instructions to install an external modem.
-
Attach one end of the cable to the PortMaster 3 C0 port and the other end to an external modem.
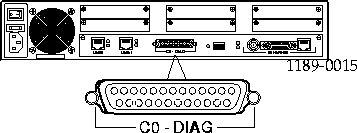
-
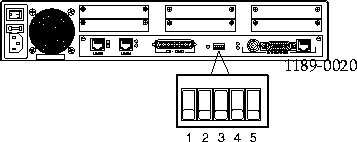
Set DIP switch 1 down.
For modem configuration information, refer to one of the following:
Follow these instructions to add memory to the PortMaster 3.
The PortMaster 3 is shipped from the factory with one 72-pin, 4MB (1x36), 70-nanosecond single inline memory module (SIMM) of RAM installed. The memory can be increased to 8MB (2x36), 16MB (4x36), or 32MB (8x36). To run the Border Gateway Protocol (BGP), the PortMaster 3 requires at least 16MB of RAM.
Caution ¯  Wear a grounding strap when handling the internal components of the PortMaster 3.
-
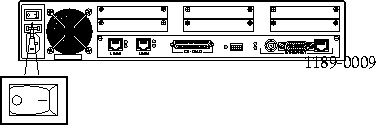
Turn the power switch off and disconnect the PortMaster 3 from the power source.
-
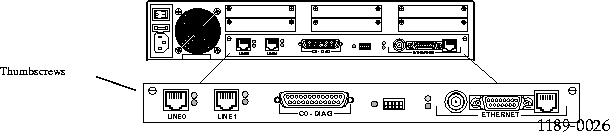
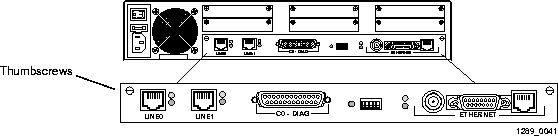
Loosen the two thumbscrews on the rear of the motherboard.
-
Using the thumbscrews as handles, gently pull the motherboard until the connectors release.
-
With the motherboard disconnected completely from the connectors, gently slide the board back through the opening until the board is completely out.
-
Lay the motherboard down on a hard, flat, static free surface.
-
Locate the existing SIMM.
-
The SIMM is located in the corner farthest away from the power supply and the external
connectors.
-
Remove the old SIMM by placing your thumbs on the metal clips on each side of the SIMM and pulling them apart, releasing the SIMM.
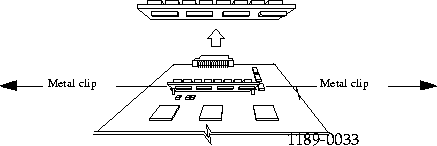
-
Insert the new SIMM at a 40-degree angle, then gently push it to the right and down (towards you) until it clicks into place at a 30-degree angle.
-
Reinstall the motherboard into the chassis.
-
Tighten the thumbscrews.
-
Connect the PortMaster 3 to the power source and turn the power switch on.
Follow these instructions to install a T1 card in a PortMaster 3.
Note ¯  The T1 card can be installed while the PortMaster 3 is in use.
-
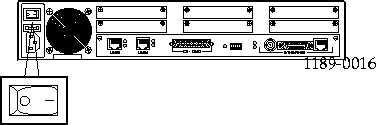
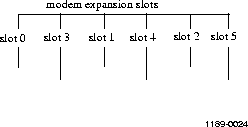
Identify the desired modem slot.
Note ¯  Only one T1 card can be installed in a PortMaster 3. If more than one card is installed, the PortMaster 3 will not recognize it.
-
Remove the backplate of the modem card port by unscrewing the two Phillips screws.
-
Store the backplate and screws in a safe place.
-
Ensuring that the rear connector is facing up, insert the T1 card into the slide guides of the PortMaster 3 modem port.
-
Gently slide the T1 card into the chassis until the rear connectors of the card touch the rear connector of the chassis.
-
Gently press the front of the T1 card until it is fully seated.
-
The 48-pin connectors will slide together smoothly; do not force the connectors together.
-
Tighten the thumbscrews on the T1 card.
-
Connect a line to the RJ-45 port of the T1 card.
-
When the green LED light is on, the T1 port is available, and when the red LED light is on,
the T1 port is not available.
When installed, the T1 card becomes line2 in ComOS. Line2 supports the same line framing and encoding as line0 and line1. However, line2 does not support ISDN Primary Rate Interface (PRI). If line2 is set for ISDN, it defaults to T1 operation.
Valid line types for line2 are T1 and fractional. When set to fractional, line2 supports one channel group; The first group found numerically is the one used for configuration. The fractional channel group supports any number of time slots and also supports 56Kbps channels.
In addition to line2, the T1 card adds a new port to the list of active ports. If the PortMaster 3 has a single PRI, this port is W24. If the PortMaster 3 has a double PRI, this port is W48.
StacLZS data compression can be enabled for line2 if the PortMaster 3 has a Stac compression card installed.
See the PortMaster Command Line Reference for information on ComOS commands.
Follow these instructions to install a compression or accelerator card in the PortMaster 3.
Note ¯  ComOS 3.6 or later is required to use the PortMaster 3 compression card, and ComOS 3.8b8 or later is required to use the PortMaster 3 accelerator card.
Caution ¯  Wear a grounding strap when handling the internal components of the PortMaster 3.
-
Turn the power switch off, and disconnect the PortMaster 3 from the power source.
-
Loosen the two thumbscrews on the rear of the motherboard.
-
Using the thumbscrews as handles, gently pull the motherboard until the connectors release.
-
With the motherboard disconnected completely from the connectors, gently slide the board back through the opening until the board is completely out.
-
Lay the motherboard down on a hard, flat, static free surface.
-
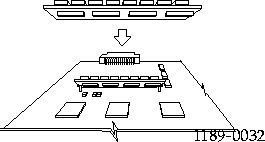
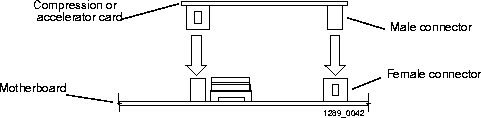
Locate the male and female connectors on the motherboard.
-
The male connector is located at the rear of the motherboard, across from the single inline
memory module (SIMM). The female connector is located approximately 4.5 inches from the
male connector.
-
Match the male and female connectors on the compression or accelerator card with the male and female connectors on the motherboard, and gently press the compression or accelerator card until it clicks into place.
-
Reinstall the motherboard into the chassis.
-
Tighten the thumbscrews.
-
The PortMaster operating system will autodetect the compression or accelerator card on
startup. No additional configuration is required.
[Top] [Prev] [Next] [Bottom]
spider@livingston.com
Copyright © 1998, Lucent Technologies. All rights
reserved.